ManyCam is a freeware tool that offers an excellent replacement for your physical webcam. It works by allowing both CamFrog and ICQ or any other video supporting program to run simultaneously. It supports most of the chat hosting services like Yahoo, CamFrog, MSN, ICQ, PalTalk, Skype, YouTube, and much more. It predominantly functions as the video source for the above video or chat enabling services.
This tool has an easy to use interface. Users must select ManyCam instead of iSight as the video source of their chat recording program. When you activate this program, you can record video from the iSight. With the help of this tool, you can launch both video and chatting services like Skype, SightSpeed, and Yahoo Messenger at the same time. In addition, when you are working on both the chat and video programs simultaneously, you can also access YouTube at the same time.
This tool appears as a menu bar icon once it gets installed on your system. This tool lets you display much more than your recorded videos in a camcorder or digital camera. You can display the Mac’s desktop over video chat with your peers and colleagues. You can further zoom in and zoom out the video shared through this virtual web cam. It has inbuilt features that allow you to edit / remove / add text to the video you share. This web camera displays date and time throughout your chat session. Further, you can enhance the visual appeal of your video by adding CGI graphics like water and fire effects. This tool is available for free download.
Download ManyCam
Auto Login Windows Vista/7 Without Login Prompt and Password
Both Windows Vista and Windows 7 have the option for multiple user accounts, and it shows you a user welcome screen after resuming session or a fresh bootup. But this login prompt might be annoying if you are the only one using that computer. So if you want to auto login into windows vista/7 without a welcome screen and password prompt, just do these steps.
How To Auto Login Windows Vista/7 without Welcome screen and login prompt
1)Click Start
2)Type netplwiz and press enter.
How To Auto Login Windows Vista/7 without Welcome screen and login prompt
1)Click Start
2)Type netplwiz and press enter.
Google Chrome for Linux - Available in Beta
 Hello everybody out there using Linux -
Google Chrome is go for beta on Linux! Thanks to the many Chromium and WebKit developers who helped make Google Chrome a lean, mean browsing machine. Here are a few fun facts from us on the Google Chrome for Linux team:
60,000 lines of Linux-specific code written
23 developer builds
2,713 Linux-specific bugs fixed
12 external committers and bug editors to the Google Chrome for Linux code base, 48 external code contributors
Click here to download Google Chrome for Linux.
How To Edit WordPress Themes/Templates in Dreamweaver
Dreamweaver is a professional software from Adobe that allows you to design web templates. By default, we cannot edit Wordpress designs in Dreamweaver but in this post I am going to tell you that how to do it.
Before starting this tutorial, I think that you have Dreamweaver installed in your system and you have basic skills required to design Wordpress themes.
Lets start : Here is a new extension for Dreamweaver called ThemeDreamer that makes WordPress theme creation in Dreamweaver very simple. You do not need any server or Wordress installed in your System, ThemeDreamer assembles the different WordPress pages into aWYSIWYG (What-You-See-Is-What-You-Get) version of your blog that you can edit with live blog data in Dreamweaver’s design view panel.
Now access Gmail, Facebook, Youtube on cable TV
There's good news on hand for those who use cable television services. You can now check your Gmail, watch YouTube videos or connect with friends on Facebook at the cost of the regular cable subscription of Rs 150-200 per month -- without having to pay extra for an internet connection.
Logic Eastern, a Noida-based manufacturer of cable infrastructure, has developed special set-top boxes which come with an in-built patented hardware that enables connections to Gmail, Facebook and YouTube. The company has made possible two-way flow of data, that is, from websites to cable operators to consumers and return by using the existing cellphone technology.
It has installed large servers which download Gmail, YouTube and Facebook pages on behalf of its subscribers and pushes them on to their television screens. For now, consumers can access this service with a special remote control. However the company is developing a wi-fi keyboard that will be given along with the set-top boxes.
How to Flush DNS in Windows, Mac and Linux
When do you want flush DNS (Domain Name System)?
You visit one of the most frequently viewed websites in your list and find it’s not loading up, it could be very frustrating at times.
The site can be down for more than one reason, the most common one being, the remote server being down. To ensure if the server is up, ping the server directly, and the response tells you the status.
Let’s assume that the servers working fine, but still the site does not load up in your browser! DNS failure can be the cause. And this us a common case if server is relocated and/or the site is moved on to a new server, as DNS propagation normally takes anywhere from 24 – 72 hrs to propagate and work fine.
This scenario is also true when you set up new domain on a server.
If the site fails to show up even after 72 hrs, you may have to clear your DNS cache to ensure the request is not going to the old ips of the site you are trying to load.
Clearing DNS cache will ensure your PC does not have old records of bad DNS entries. If the bad entries are not flushed then you need to wait up to 24 hours for it to be dropped from the cache automatically, which is a scheduled activity in some computers.
The following list gives you the set of commands to flush DNS on different platforms:
How To Destruct Or Delete Emails From Recipients Inbox
BigString.com is a free email service of unlimited storage space, designed at providing immensely secured and certified mail services. It strictly complies with all the codes and conduct to protect your password and private data. It is loaded with adequate tools and settings to easily receive, send, delete and edit your mails.
For me the most most important advantage of using BigString is its superb auto-destruct function. At times I’d want a particular mail to be read and deleted immediately after the first read – BigString gives me that option. In fact I can set how many times the mail be read before it’s deleted from the recipients mail box.
For me the most most important advantage of using BigString is its superb auto-destruct function. At times I’d want a particular mail to be read and deleted immediately after the first read – BigString gives me that option. In fact I can set how many times the mail be read before it’s deleted from the recipients mail box.
Liferea: RSS feed reader for Linux users
RSS feeds have been really very useful for me and I love to manage all the feeds which I follow via FeedDemon. Recently when I started using Ubuntu I was really missing my Feed manager. Then I found this cool feed reader. Liferea is a feed manager for Linux systems. There are many feed readers out there but all of them requires new libraries to be installed or the worse they do not support linux systems.
The best thing about this is you can easily add your Google feed reader feeds to this. So if you are already using FeedDemon and if it is synchronized with your Google Account then you can easily add all those feeds to Liferea also.
Liferea is the best feed reader available for the Linux systems. It’s fast, it’s simple and it’s easy to use.
Read this to know how to install it in your Linux.
Feel free to post comments. :)
Free Download Microsoft Office 2010 With Activation Key
Microsoft Office Professional Plus 2010 beta version also includes MS Publisher and Infopath 2010 along with Word, Excel, Outlook and Power point applications.
New Features Of Microsoft Office 2010
- Outlook Social connector which includes the option to add friends to your social network direct from Outlook.
- Built in screen capture for MS Powerpoint.
- Upload or Save directly to Windows Live Sky Drive or SharePoint 2010.
- Improved user navigation and Icons.
- One click PDF saver.
- Embed online videos into presentation.
Online Password Manager for Chrome, Firefox and IE
If you looking for an online password manager which supports almost all the popular browsers like Firefox, Google Chrome, Opera and Safari then try out Lastpass. With this free online password manager, the login details like username and password which you have already stored in Firefox can now be easily (and securely) accessed in Chrome, Opera, and on my iPod with a simple little button.
Features and Performance
Lastpass performs well in capturing passwords from ajax forms which other browsers fail to do so.
Allows you to import from every major password storage vendor and export too.
Create strong and different passwords for all sites (you only have to remember one).
Mobile access at http://m.lastpass.com
Security (most important part)
Passwords are locally encrypted and stored on your PC with AES, then uploaded to allow syncing with other computers or browsers. Only your LastPass password can unlock your data.
Install LastPass, Firefox addon
Disable Smart Window Arrangement in Windows 7
Windows 7 uses its own intelligence to arrange your windows. For an example, when you drag a window to the top of the screen it automatically maximizes. But if your wanna master Windows 7 at your behest, you need to disable this arrangement. Let's see how to go about it
1. In the Start Search type regedit to edit the registry
2. Go to HKEY_CURRENT_USER\Control Panel\Desktop
3. Set WindowArrangementActive value to 0, and reboot
Now your windows will behave as in the earlier versions.
Get a Power Efficiency Report in Windows 7
This one's especially for the laptop users gasping for their battery life. Well, WIndows 7 is equipped to provide you comprehensive information about the power consumption. You can use this feature to increase your laptop's battery life as well as performance. Here's how to get to it
1. Type cmd in the Start search to open the command prompt
2. When it opens right-click it and choose Run as administrator
3. Type in powercfg -energy in the command line and hit Enter
Windows 7 will scan your system suggesting ways to improve power efficiency. To find the results you must follow the path. Typically its in the System32 folder.
Use VLC media player as Video Cutter
How to Cut Videos Using VLC
Install the latest VLC player.
Open player and under option “View” select “advanced controls”.
Now you can see some extra icons available in your control panel. First button from left is the “RECORD” button.
Increase Torrent Download Speed By Half Open Patch
Increase your torrent download speed by allowing more more concurrent half-open connections. By default Windows limits the number of half open connections to 10. This limit is entered by company Microsoft trying to make slower virus spreading from infect computer and cut down opportunities of participation of a computer in DOS attacks.
This limit imposed by windows on the half open connections could be removed by patching the TCPIP.sys file. Patching the TCPIP could sometimes cause problems with certain routers like frequent auto restarting. So use this patch only as a final resort.
How to Half Open Patch TCPIP.sys - Windows VISTA / Windows XP / Windows 7
This half open patch will allow you to start more concurrent half open connections and hence increase torrent download speed.This Patch works for both 32 and 64 bit versions of windows.
Copy Files From Damaged/Corrupted Hard Disks, CD’s and DVD’s
Most of us use CD’s, DVD’s or hard disks to backup our important files. But these storage medium have the risk of getting damaged at any time. And when you try to copy data from those damaged CD/DVD’s or corrupted hard disks, you would definitely get a Windows Error or cyclic redundancy check error. Roadkil's Unstoppable Copier is freeware utility which helps you to copy data from a damaged disks.
Unstoppable Copier from Roadkil allows you to recover data from disks with physical damage or from disks with problems such as bad sectors, scratches or that just give errors when reading data. This Free software will recover every readable piece of a file and put the parts together. This also helps you to recover important files from damaged CD’s or DVD’s. Using this method most types of files can be made useable even if some parts were not recoverable in the end.
Download Correct Drivers for Unknown Devices
Most of the computer hardware's comes along with their respective device drivers in a disc. If your driver CD gets lost or corrupted, then you can always download the necessary drivers from the manufacturer's website or restore the drivers from the backup if you have created earlier.
But if you do not have a backup and is unsure about the manufacture of the device or your device model, then you will not be able to search the device driver online and windows will be showing errors like “Unkown device Found” or “Device not identified” in your system tray. Here is an excellent trick to find out the correct drivers for the unknown devices in your device manager.
How to Download Drivers for Unknown Devices
1) Find the Vendor and Device ID of the unknown device. To do this,
Open Device Manager
Hidden Uninstall Options in Add/Remove programs
1) Browse to C:\Windows\inf\ and make a backup copy of sysoc.inf.
2) Then open the original file C:\Windows\inf\sysoc.inf in notepad.
3) Go to "Edit" and select "Replace".
4) In "Find what:" type, hide
and in "Replace with:" type, then
select "Replace All", save and close the file.
5) Go to the "Control Panel", "Add/Remove Programs", select "Add/Remove Windows Components".
6) You will now see many more Windows components to uninstall.
7) Do not remove anything with no label or that you do not recognize or fully understand what it does. Doing so can break certain functionality in Windows.
Warning:- Proceed at your own risk!!!
Acceleration Fix For Mouse in Windows XP
Permanent Acceleration Fix
It seems that even without pointer precision disabled, the mouse under XP is still influenced by an acceleration curve. This is especially noticeable in games. To completely remove mouse acceleration from XP, you will need to go into the registry and adjust the SmoothmouseXYCurve values. Here is how its done.
1. Click Start button
2. Select Run
3. Type 'regedit' in the open textbox
4. Open the tree 'HKEY_CURRENT_USER', select control panel, then select mouse
5. Right clicking, modify the SmoothMouseXCurve and SmoothMouseYCurve hexidecimal values to the following:
Vodafone Free GPRS trick 2009 for all Customers
 I have been receiving many emails asking about how to access free GPRS for Vodafone customers. Vodafone has been slightly strict about there GPRS until this trick has been found out. In order to get Vodafone free gprs, you will have to try out this method I’ve mentioned below exactly. This vodafone trick has been tested on many mobiles and found out to be effective in India.
Google Chrome OS Images Leaked ??
It's been just a few weeks since we first heard of about Google's Chrome OS and it's the second time that we are hearing about the screenshots/images of the OS at work being leaked. While the first "leak" was proven a false alarm, this one looks slightly more convincing.
Another thing that makes this leak slightly more convincing is that these are blurred; crap images shot by a seasoned image leaker (from a Nintendo DS, apparently) who knows how to take photographs that will soon end make rounds of the interweb. The images set by an "anonymous tipster" to folks over at Downloadsquad show the Chrome OS at work.
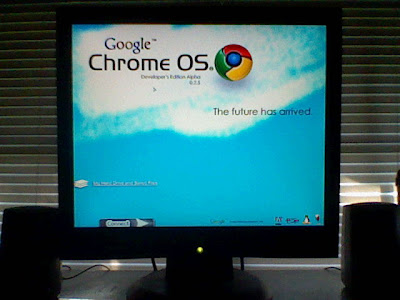 Now, before going overboard, let us mention the flip side. While this one does look more convincing than the previous attempt, there are reasons to believe this one too might be the handiwork of a person who had a lil bit of extra time at his disposal and is good at photoshop. To start off with, the UI bears no resemblance to Google's traditional, simplistic approach. In one of the images, you can also see a Linux logo. Somewhere, it just doesn't feel right! We leave it to you to decide how true (or false!) this one turns out!
 Now, before going overboard, let us mention the flip side. While this one does look more convincing than the previous attempt, there are reasons to believe this one too might be the handiwork of a person who had a lil bit of extra time at his disposal and is good at photoshop. To start off with, the UI bears no resemblance to Google's traditional, simplistic approach. In one of the images, you can also see a Linux logo. Somewhere, it just doesn't feel right! We leave it to you to decide how true (or false!) this one turns out!
Hide Your Computer From Windows Network
So, if you want to hide your computer from others users or administrators on a network for any reason just follow the easy steps given below.
This method is best used when you are an administrator who doesn't want other people to know you are on the network Or maybe you are a certain someone like me who doesn't want the administrator to know you are on the network.
First method to hide from windows network Using Command line (very easy)
Open command prompt (start->Run, type CMD if your using windows XP/2K/Vista)
Enter the following command:
Change the default theme for newly install XP
Step 1
>>Insert XP CD into your CD ROM and copy all its data to your hard disk in a folder name TAMAGXP
Step 2 (Creating .theme file)
>>First download the theme you want for your WINDOWS XP default theme and install it.
>>After you are done right click on the desktop and select properties.
>>Click the Save As button, and save your theme and name it tamag.theme.
Find Lost Space On Your Hard Disk
Space Sniffer is a freeware for Windows XP and Windows Vista that gives you an idea of how folders and files are structured on your disks, in this way you can easily find lost space in your hard drives.
Some quick features
* Fast and easy to use
* Supports drag and drop
* Intuitive structure layout, multiple views for different media
* Zoomable elements, navigate like a web browser
* The Windows folders and file popup menu is accessible by right mouse click
* It’s possible to restrict the view content by typing simple yet powerful filtering criteria
* Different views of the same media can show differently filtered elements
* Customizable in geometry, colors, behaviors
* You can navigate even during the scan
* Smart cached scanning engine, multiple views, single scan
* You can refine a zoomed area by a secondary scan process, even with main scan active
* Reacts to file system events, keeps always in synch, warns you by blinking elements
* Can scan NTFS Alternate Data Streams
* It doesn’t clutter your registry, only a plain XML configuration file
* It’s portable, no installation required, just put the executable somewhere and let’s go
Download Instructions
Click here to download SpaceSniffer from the official website.
Stop Autoplay In USB Flash Drives By Pressing One Keyboard Button
Today I want to share a little tip that will stop autoplay in USB Flash drives. Not only flash drives, it also stops autoplay for CD and DVD also.
While inserting CD, DVD or any flash drive, simply press and hold the Shift key, this will disable the autoplay dialog box. Holding down the Shift key will also block the applications that starts automatically.
Note : Works fine in Windows XP and Windows Vista
Defragment Hard Drives Using Command Prompt
Today I am sharing the easiest method with you to defragment your hard drive. Though you can perform this task with third party applications also, but why don’t do it a simple way.
Here is a simple method to defragment your drives using Command Prompt :
1. Click on Start and then select Run, type CMD in it and hit enter.
2. Suppose you want to defrag your C drive, then in the command box, write
defrag C: -f -v
and hit enter. The defragmentation will start.
Similarly, you can perform this task on diffrent drives by changing the name i.e
defrag C: -f -v
defrag D: -f -v
defrag E: -f -v
Resetting a Forgotten Password in UBUNTU
It happens to everyone. You have so many usernames and passwords that you can't remember them all. Fortunately, Facebook, Gmail, and about a billion other online services have a "forgot password" link. Just click it and the web service will either email your password to you or allow you to reset it and enter a new one.
But what happens when you forget the password for your operating system.
While you might think the easiest thing to do is reinstall Ubuntu, (after all, this is a clean install so it's not like we'd be losing any data on our hypothetical system), you can save yourself 15-30 minutes by changing the password. It turns out you don't have login to change your password. As we discovered thanks to a useful post on the Ubuntu forums, you can do it from the bootloader screen. Check out the 5 easy steps after the jump.
1. Turn on your computer, and as soon as you the Press Esc to enter grub message, press the escape key.
2. Select the option that says (recovery mode).
3. Your PC will boot into a shell. Once you get a command prompt, type passwd username where the username is your username. If you can't remember this, then you can type ls /home which should bring it up.
4. Enter a new password when prompted, and again when prompted again
5. Type shutdown -r now to reboot your system.
That's it. You should now be able to login with your shiny new password.
Copy Any Movie DVD to Hard Disk : Bypass DVD Copy Protection
At certain times when we used to copy the original DVDs (movies) to the hard drive, it used to get a copyright error.
We get the error because those DVD titles are often encrypted, which prevents us from either copying them to hard drive or if we manage to do so, being able to play the resulting files.
So here is a freeware called DVDSmith to copy any DVD movie with excellent DVD copying quality in Full Disk Mode. It can backup, clone or copy DVD movie to computer as DVD folder, ISO file.
With DVDSmith Movie Backup, everyone can experience its features in super fast copying speed (only about 15 minutes for DVD-5 or 25 minutes for DVD-9) and more! It can even bypass the copy protection error. Below are some quick features about this freeware :
* Supports Copy-Protected DVDs, Copies all DVDs even with anti-piracy encryption.
* Perfect Video & Audio Quality - like the original.
* High speed and quality. Copy your DVD movie in a very short time.
* Supports both NTSC & PAL DVD movies.
* Make high quality back copies of your favorite DVD movies.
* Sound and video never change in quality.
* Very easy to use for everyone - Just click and Backup.
Download Instructions: Click here to download DvdSmith from the official website.
Forcefully Eject USB Flash Drives In Windows
While ejecting USB flash drives from PC, sometimes an error comes saying The device “Generic Volume” cannot be stopped right now, Try stopping the device again later.
Here is a free utility called EjectUSB that forcefully stops all the running programs and helps in ejecting pen drives safely.
It is designed to be a simple utility to close all programs running from a specified drive or folder and then attempt ejection if a drive was specified.
Download Instructions: Click here to download this software from the official website.
Assign a Permanent Letter to a USB Drive
If you have multiple pen drives you might have noticed that every time you put in your drive it will be assigned a different drive letter.
This can be frustrating when trying to run backups or opening files from software as recent drive letter is changed. Even if you have created playlist of the songs which are in your pen drive it won’t work if the drive letter is changed.
Here are the steps you will have to follow to assign a permanent drive letter:-
1. Go to Start > Run
2. Type mmc in the box and hit enter.
3. Select File > New
Fix Slow Tab and Broken Tab Issues in Internet Explorer 8
How To Install Windows 7 From a USB Drive
Windows 7 can run on machines with lower specs than required for Windows Vista, and many users are actually finding it runs better than Windows XP on lower spec machines. It’s also ideal to run on newer netbook machines, but unfortunately many of these do not include a DVD drive so how do you install windows 7 on a machine without a DVD drive?
How To Install Windows 7 From A USB Drive
1. Find a standard 4GB USB Drive and plug it into your machine
2. Click Start in your enter ‘cmd’ in the run field. Once cmd is open type in ‘diskpart’ and a new window will open
3. In the new diskpart window type:
How To Install Windows 7 From A USB Drive
1. Find a standard 4GB USB Drive and plug it into your machine
2. Click Start in your enter ‘cmd’ in the run field. Once cmd is open type in ‘diskpart’ and a new window will open
3. In the new diskpart window type:
Watch Windows Aero in Slowmotion
Here’s a very good trick for Windows Vista Aero users! If you are using Windows Aero, you can use this Registry trick to slow down the animations (i.e. maximize/minimize) when you hold down the Shift key on your keyboard. You have to modify the Registry a little to achieve this!
The advantages of using this trick is that not only does this allow you to see the animations clearer but it also leaves the Flip 3D on the screen even after you let go of the [Ctrl] + [Windows Key] + [Tab] combination. Normally what happens is that Flip 3D exists the screen as soon as you leave this key combination. Whenever you minimize or maximize or close a window, if you hold the Shift key down you will be able see how impressive Vista is in slow motion. Follow these steps:
The advantages of using this trick is that not only does this allow you to see the animations clearer but it also leaves the Flip 3D on the screen even after you let go of the [Ctrl] + [Windows Key] + [Tab] combination. Normally what happens is that Flip 3D exists the screen as soon as you leave this key combination. Whenever you minimize or maximize or close a window, if you hold the Shift key down you will be able see how impressive Vista is in slow motion. Follow these steps:
Create your own BSOD in Windows XP
While it may seem odd to think about purposefully causing a Blue Screen Of Death (BSOD), Microsoft includes such a provision in Windows XP. This might come in handy for testing and troubleshooting your Startup And Recovery settings, Event logging, and for demonstration purposes.
Here's how to create a BSOD:
1. Launch the Registry Editor (Regedit.exe).
2. Go to HKEY_LOCAL_MACHINE\SYSTEM\CurrentControlSet\Services\i8042prt\Parameters.
3. Go to Edit, select New | DWORD Value and name the new value CrashOnCtrlScroll.
4. Double-click the CrashOnCtrlScroll DWORD Value, type 1 in the Value Data textbox, and click OK.
5. Close the Registry Editor and restart Windows XP.
Listen Online Bollywood Live Radio - City 1016
ARN City (Wait for player to load...)
Refresh or hit F5 if the player doesn't load.
The minimum connection speed that would enable you to experience this content: 64 kbps.
Wait for at least 30 seconds to allow player to load.
Online streaming by StreamTheWorld.
Do not unzip this - it is a huge 42 KB file !!!
This is truly a work of clever technical intelligence, You have a 42 KB zip file that expands to 45 PB ( 1 Peta bytes=1012 bytes). Here is what the web site hosting this file says,
The file contains 16 zipped files, which again contains 16 zipped files, which again contains 16 zipped files, which again contains 16 zipped, which again contains 16 zipped files, which contain 1 file, with the size of 4.3GB
So, if you extract all files, you will most likely run out of space :-)
Now, how on earth does that can happen, well the answer is a characteristic property of zip compression, data redundancy, actually this file has a 4.2 GB file consisting of all zeroes, this means high redundancy and so zip is able to compress it that small.
Now, go ahead and unzip it!!!
Enhance Your Computer’s Performance With Readyboost
ReadyBoost is a component of Microsoft’s Windows Vista operating system. It works by using flash memory, USB 2.0 drive, SD card, CompactFlash or any kind of portable flash mass storage system as a drive for disk cache. ReadyBoost is present, with fewer restrictions than in Vista, in the beta version of Windows 7. ReadyBoost is also used to facilitate SuperFetch, an updated version of Windows XP’s prefetcher which performs analysis of boot-time disk usage patterns and creates a cache which is used in subsequent system boots.
In order to take advantage of this feature and boost performance as stated above you will need a flash memory device. But if you really want to see the boost your device should meet some minimum performance and space requirements:
• The device must be at least 64 MB
• The device must be USB 2.0
• It has to be able to read at 3.5 MB/s
• It has to be able to write at 2.5 MB/s
Pin Folders To Start Menu In Windows XP, Vista Or 7
Windows XP, Vista or 7 allows us to pin our most frequently used application to the Start menu by right clicking on it and selecting Pin to Start Menu. This gives us instant access to these applications. If we want any other item to pinned list, we can do so by dragging and dropping it to the Start button or the Start menu. If we want to remove these pinned item we can do so by right-clicking it and clicking Unpin from Start Menu or Remove from This List. The order of the items in this list can be arranged by dragging and dropping them to the preferred location. To add a folder to the Start Menu Pin list, you may use the drag-drop method as stated above. But we cannot pin our frequently used or favourite folders to the Start menu by right clicking on it. Here is a cool trick to pin your folders to the Start menu by right clicking on the folder and selecting Pin to Start Menu:
• Click on the Start menu button and type regedit in the Start menu search box and press Enter. For XP users select Run from the Start Menu and type regedit in the Run dialog box and press enter.
• This will open the registry editor.
• Click on the Start menu button and type regedit in the Start menu search box and press Enter. For XP users select Run from the Start Menu and type regedit in the Run dialog box and press enter.
• This will open the registry editor.
Enhance Your SATA Hard Disk Performance in Vista
Microsoft Windows Vista users must have used the search box on the Start menu and after using it they must have experienced its sheer power. This search box not only searches in your start menu and control panel but also your personal files like pictures, documents and even your emails. This makes it very useful for everyday tasks. It also saves time and we also tend to get the habit of getting what we want by just typing a few letters and the reason why I love it!
Getting back to the topic, if you are having a lot of personal files then this feature of the search box, i.e., searching through files takes toll on its performance and causes it to slow down. But if we narrow down the search to only start menu and control panel then we can easily get some performance benefits. This tip will help us to find the program or setting easily and faster. Follow these steps to make search box faster:
1. First right-click on the Start button and select Properties.
2. Then select the Customize button.
3. Remove the check where it says Search Communications.
4. Then for Search Files set Don’t search for files.
5. Click OK, then OK again and you are done.
Enjoy a speedy search and get your results quicker! :)
Stop Automatic Reboot Of Windows XP/Vista After Windows Updates
Windows Update will automatically reboot the system when you have your system configured to “Automatically download recommended updates for my computer and install them” and one or more of those updates requires a reboot. This may cause problems when you are working on something important and your work is not saved. So to stop this behaviour use the following registry trick. This trick applies to both Windows XP and Windows Vista.
• Click Start then select Run, type regedit in the Run dialog box and press Enter to open the registry editor.
• Go to the key [HKEY_LOCAL_MACHINE\SOFTWARE\Policies\Microsoft\Windows\WindowsUpdate\AU]
• Create a new DWORD value, or modify the existing value, called NoAutoRebootWithLoggedOnUsers and set it 1. This setting means “do not automatically reboot” and if you want to revert back to the default settings set this value to 0.
Copy Photos from your Friend's Profile in Orkut
Recently Orkut disabled the right click on the photos of other person's profile and due to this we can't copy the photos. To copy the photos follow these steps for any web browser:
Step 1 - Click on the thumbnail of the photograph you want to download.
Step 2 - Once you get the enlarged version of the photograph, click on it and drag to the address bar i.e. keep pressing left-click and move the arrow to the address bar (where you type www.orkut.com)
Step 3 - On releasing left-click, the address bar should now have link for image.
Step 4 - Now browser window consist of image only. Save it as you normally do.
Shortcut of this method is to click on the photo and just drag on to the desktop or any folder.
Feel free to post comments :)
Windows XP Hidden Applications
Microsoft has kept many useful applications hidden in Windows XP for reasons they know better. Today I will give you a list of such applications. You may know or have used them but there are some you may don’t even know they exists. Depending on the version of Windows XP you are using not all the commands will work, some needs Administrator privileges to run properly. These applications can only be accessed using the Command Prompt or by using the Run dialog box or by double clicking on the .exe file of the application.
Run any of these applications: go to Start > Run and type the executable name
• Account Manager
Command to run: syskey.exe
Use: It encrypts Windows XP account database.
Disclaimer: Use with caution, may cause slow performance if enabled.
• Clipboard Viewer
Command to run: clipbrd.exe
Use: To view or delete clipboard contents.
Easiest Way To Catch IP Address Of Any Person Online
How to use this service :
1) First visit IPCatcher
2) Now choose a redirect URL and a password and the script will create you a link.
3) Then send this link to anyone you know (online) and the script will record their I.P.
4) Click Login at the bottom of the page to login and view the IP addresses of those who have visited your link. Simple !
How To Delete A Particular Web Address In Internet Browser History
Well this post of mine is just a simple help for those who are newbies to computers. Below is a simple procedure to do it :
To delete a single page, open your Internet browser and click on the drop down menu in the address bar.
Now select the link that you want to delete, just highlight it and press shift+delete from your keyboard.
Simple !!!
Solution for blogger XML error BX-bliced messages after upload new templates
What to do:
1. Download the template you want to upload
2. Get the XML file and open in a WordPad (right click --> Open With --> WordPad).
3. Press “Ctrl + F” and in the search box type widget id
4. In every widget line it will display something like this : widget id='example1', replace that number for a any other one.
Example, if the widget says 1, erases it and place number 2 instead.
So you will have something like this now: widget id='example2'
5. Do this to all widgets you find in you XML code. When you finish SAVE(Press CTRL+S)
6. Go to Blogger --> Layout --> HTML
7. Upload --> Preview / Save
Done! Enjoy it.
Update* if you get this error bX-si9ejx, after edited your template, you should delete cookies and temporary internet files at your browser and upload template again.
How to Enable Hotmail POP3 access in your Country
Hotmail POP3 technology is available to Hotmail users in the United Kingdom, Canada, Australia, France, Japan, Spain, Germany, Italy, and the Netherlands. If you country is not in the list and want to access the Hotmail POP3 Access. Than you have to do some simple changes in your Hotmail Account to Access the POP3.
 Go to Options>More Options in Hotmail, Select View and edit your personal information in your account and click on Registered Information. Edit those information so that they are in a country that currently supports Hotmail POP3. You can later change it back if POP3 support is added for your country as well.
When you set up Hotmail in the e-mail program on your PC or mobile, you may be asked for the following information:
POP server: pop3.live.com (Port 995)
POP SSL required? Yes
User name: Your Windows Live ID, for example yourname@hotmail.com
Password: The password you usually use to sign in to Hotmail or Windows Live
SMTP server: smtp.live.com (Port 25)
Authentication required? Yes (this matches your POP username and password)
TLS/SSL required? Yes
Go to Options>More Options in Hotmail, Select View and edit your personal information in your account and click on Registered Information. Edit those information so that they are in a country that currently supports Hotmail POP3. You can later change it back if POP3 support is added for your country as well.
When you set up Hotmail in the e-mail program on your PC or mobile, you may be asked for the following information:
POP server: pop3.live.com (Port 995)
POP SSL required? Yes
User name: Your Windows Live ID, for example yourname@hotmail.com
Password: The password you usually use to sign in to Hotmail or Windows Live
SMTP server: smtp.live.com (Port 25)
Authentication required? Yes (this matches your POP username and password)
TLS/SSL required? Yes
How to install KDE on Ubuntu
Ubuntu's default desktop environment is Gnome. Sometimes people using Ubuntu want to try out KDE as well, though.
Warning: having KDE and Gnome together means you'll have cluttered application menus full of KDE applications and Gnome applications. There may be other minor integration issues, but none should impact functionality, and you can find help for those on the Ubuntu Forums.
Even though these instructions are for KDE, the same principle applies for adding Gnome to Kubuntu or XFCE to Kubuntu or Ubuntu. Basically, you install the desktop environment, log out, and choose the desktop environment.
Go to System > Administration > Synaptic Package Manager
Enter your password when prompted.
To password protect a folder in Linux
Use the zip command:
zip -e -r "name_of_the_new_zip_file" "path_of_the_folder_which_has_to_be_protected"
Example:
If you want to protect a folder named "old" in your desktop. Just do it...
zip -e -r /home/gautam/Desktop/new /home/gautam/Desktop/old
[gautam@gautam-home ~]$ zip -e -r /home/gautam/Desktop/new /home/gautam/Desktop/old
Enter password:
Verify password:
This will create a zip file named "new.zip" in your desktop (new.zip). After that delete the folder "old".
Free Online Radio via Gtalk/Yahoo/MSN
Listen free online radio through Gtalk or your favorite messenger. You can use this online radio service either via the browser interface (inside gmail) or the Gtalk application itself.This online chat radio is made possible by the guys from gtalk2voip. Google Talk, MSN/Live Messenger and Yahoo Messenger users now can connect to a number of Internet Radio Broadcasting stations and start listening radio streams.
How to listen to free online radio
1. Subscribe to gtalk2voip by adding service@gtalk2voip.com to your buddy list.
2. Send RADIO command to service@gtalk2voip.com to get list of available radio stations along with their ID’s.
3. To listen a particular radio station, simply send a command RADIO (number/id).
Here is the complete list of online radio stations available through them.
LIST OF AVAILABLE RADIO STATIONS:
100 - 181.fm - Kickin Country (Todays Best Country!), http://scfire-chi0l-1.stream.aol.com:80/stream/1075
101 - 1.FM - Country, http://64.62.194.11:8020/
102 - Atlantic Sound Factory - ASF Radio, http://69.31.50.146:80/
103 - 100.7 Jack FM, San Diego, http://38.116.132.31:9024/
104 - 102.7 FM The Fringe, http://64.72.124.89:8134/
105 - 181.fm - The Buzz (Your Alternative Station!), http://scfire-nyk0l-1.stream.aol.com:80/stream/1022
106 - 181.fm - The Mix Channel (70s, 80s, 90s and Todays Best Music), http://208.53.158.167:8032/
107 - 181.fm - The Eagle (Your Home For REAL Classic Rock!), http://208.53.158.126:8030/
108 - .977 The 80s Channel, http://scfire-ntc0l-2.stream.aol.com:80/stream/1040
109 - 1.FM - Channel X, http://209.51.161.54:8072/
111 - Radio Helsinki - 92.6 MHz, http://88.198.49.11:8000/live56.ogg
201 - KCRW World News, http://scfire-ntc0l-2.stream.aol.com:80/stream/1047
202 - Sporting News Radio, http://scfire-chi0l-2.stream.aol.com:80/stream/1057
203 - KPFK - Southern Californias 90.7 FM News, Talk n Music, http://64.27.31.66:80/
204 - WBUR 90.9 FM, Bostons NPR News Station, http://205.234.188.21:80/
205 - TalkRadioX -- http://talkradiox.com, http://tv.stream-music.net:8332/
206 - Arabian HIT 96.7 FM, Dubai, http://wm-live.abacast.com/arabian_radio-hitfm-24
To connect, type RADIO number where number is a station numerical ID from the list above.
10 ways to tweak your Linux Boot Process
Linux rarely needs to be rebooted. But when it does, it’s often slow to boot. Fortunately, there are ways to speed things up. Some of these methods are not terribly difficult. (although some, unfortunately, are). Let’s take a look.
#1: Disable unnecessary services
Depending upon the use of the machine, plenty of services won’t be needed. Using Linux just for a desktop? Then you won’t need sendmail, http, and many other services. If your server is only a web server, you can shut off many services as well. To do this, you can go to the Administration menu and take a look at the Services entry. Just deselect all of the services you don’t want to start.
#2: Disable unnecessary kernel modules
If your desktop is wired to the Ethernet, you don’t need to have a wireless kernel module loaded. This task is a bit more difficult and will require a kernel recompilation, which is not the easiest task to undertake. To do this, you will need the kernel sources. Then, follow the standard steps for compiling a kernel. The difference is that you’re going to go through your system and disable all of the modules you don’t need.
The best way to find out what kernel modules currently install and run on your system is to install Bootchart. Not only will this give you a good list of modules, it will illustrate for you what is happening during your system boot. You can also issue the command chkconfig –list | grep 3:on to find out what services are running. Once you know what loading modules you don’t need, you can remove them during a kernel recompilation. While you’re at it, compile the kernel to exactly match your architecture.
Speed up Windows Vista booting process
In Windows Vista while booting it uses only a single core of your PC irrespective of multiple cores available. To utilize your processor during boot up follow the steps given below.
How Enable booting up with multiple cores:
1) Go to start->run->msconfig and press enter.
2) Select the boot tab.
3) Click on Advanced Options.
4) Check the appropriate number of ports according to your system configuration.
5) Click OK.
Subscribe to:
Posts (Atom)
